 Skip to content
This is the easiest way to achieve a massive speed boost on your Raspberry Pi 3 B. More importantly, making the right software settings changes will help your software run faster than ever before.
In addition to overclocking the CPU within safe limits, a proper heatsink or fan will help improve performance. Stopping redundant background tasks and using a lightweight OS go a long way as well.
For hardware, using a high-quality power supply will go a long way to keep things running smoothly. These changes dramatically improve speed and efficiency so projects can be executed sooner.
Understanding Raspberry Pi 3 B Performance

Despite its small stature, the Raspberry Pi 3 B is a capable little computer. Yet, even this superb performance can fluctuate, depending on a range of critical variables. To get the most out of this device, it’s essential to understand the hardware, software, and maintenance elements that influence its speed. By deconstructing these elements, we can learn how to troubleshoot all too frequent problems and get the most out of this powerful device.
What Affects Raspberry Pi Speed
Several important considerations determine how fast and responsive the Raspberry Pi 3 B is. One of the most obvious, but most important, is the CPU clock speed and RAM capacity. The Raspberry Pi 3 B+ has a default clock speed of 1.4GHz. If the chip temperature goes above 140°F, it throttles down to 1.2GHz, and above 179.6°F, it throttles down to 1.1GHz.
CPU overclocking is possible by editing the /boot/config.txt file. Watch out, this will cause overheating and subsequent throttling. To avoid overheating, implement cooling methods such as a fan. Look at passive options like the Flirc Case or Argon Neo to maintain lower temps.
The choice of operating system makes a big difference too. An efficient, lightweight OS such as Raspberry Pi OS Lite is resource-effective. At the same time, using a 64-bit operating system can increase performance by as much as 25% on compatible hardware.
External devices such as USB drives or peripherals can impact system performance. They can saturate the system’s I/O capabilities and hurt performance. Bloatware background processes, like malware unwanted services, or daemons, eat up precious CPU cycles and RAM. You can find them pretty easily and track them down using tools like htop.
Why Optimizing Performance Matters
Maximizing the Raspberry Pi’s performance provides real-world results. Whether you are gaming, media streaming, or using your own home server, the increased speeds lead to an overall better performance. Maximum resource efficiency means the device can be used for longer, ideal for projects that need to run all the time.
A fast and responsive system is more pleasant to use, and even modest performance gains transform the user experience from frustrating to delightful. Consistent maintenance, like keeping the OS and applications updated, avoids the risk of slowing down the experience due to outdated software or a security breach.
Network connectivity plays a role in performance, especially for applications that need to connect to the internet. A poor connection may introduce lag, making a fast and consistent network important. Use vcgencmd get_throttled and other such tools to check for throttling.
Together, they will assist you in quickly identifying power supply or thermal limitations, simplifying troubleshooting, or ensuring peak performance.
Optimize Software for Better Speed

To get the best possible performance from your Raspberry Pi 3 B, you’ll want to take a more aggressive approach to software optimization. By cutting down on how much resources your software needs, and working to make sure the system is operating at peak performance, big improvements become possible.
Here are the key steps to achieve the highest possible speed by making changes to software.
Remove Unnecessary Applications
The first step in optimizing your Raspberry Pi performance is getting rid of the software you don’t want. These preinstalled applications can use up precious SSD storage and drain overall system responsiveness. By recognizing and removing unwanted programs, you can reclaim disk space and lower your CPU usage.
Raspberry Pis often come loaded with a ton of bloatware, like old text editors. You will find games that you will most likely never use. Applications such as LibreOffice or Wolfram are often overkill for the average user, contributing to slow Raspberry Pi performance.
Package managers such as apt or apt-get make it very simple to remove many applications. For instance, running sudo apt-get remove LibreOffice would instantly uninstall that software, alleviating potential bottlenecks.
To know how much storage you’re saving, it’s useful to check your storage usage both before and after uninstalling these apps. Utilities such as df -h give you quick and easy visibility into available space, allowing you to easily gauge the impact of your efforts on Raspberry Pi experience.
Even taking this one step so far can make for a much smoother, faster experience overall, improving processing speeds and enhancing your Raspberry Pi setup.
Disable Unused Services and Features
The Raspberry Pi performance can be significantly impacted by too many services and features running in the background by default, even when they aren’t in use. Disabling these unnecessary packages will take a lot of the load off your Raspberry Pi setup. Start by developing a checklist of duplicative services that may not be essential for your needs.
For instance, services like Bluetooth, printing, or remote desktops should not be required by everyone. To turn these off, utilities such as raspi-config or direct editing of configuration files will suffice for efficient operations.
Check for unnecessary startup applications. Run systemctl list-unit-files --type=service to find processes that start at boot. If you find services you don’t need—such as cups for printing—on this list, do something about it!
Turn them off by executing sudo systemctl disable cups. Make it a habit to regularly revisit your list of disabled services, as your needs can evolve over time.
By disabling features you don’t use, you can reduce slowness and complexity while drastically increasing overall system responsiveness.
Identify and Stop Resource-Heavy Processes
One of the best ways to optimize performance is to proactively find and halt resource-heavy processes. With tools like htop or top, you can identify which applications are the most CPU or RAM-intensive.
Common offenders are browsers with many tabs open or media servers operating in the background. As an example, a resource-intensive process such as chromium-browser might drag down your system.
Try to reduce background usage by closing applications you’re not using or terminating them in the terminal with kill or pkill commands. By regularly reviewing what’s running, you’ll help keep your Raspberry Pi responsive and prevent it from becoming sluggish by software accident.
Install ZRAM for Enhanced Efficiency
ZRAM is another important tool in our arsenal, as it dynamically creates swap space in RAM by compressing data, which speeds things up. This method greatly reduces the amount of storage space used on your Raspberry Pi, allowing for improved speed during tasks that need high memory usage.
To use it, first install the necessary package with sudo apt-get install zram-tools. Then, enable it by editing the configuration file, indicating how much RAM you would like to allocate. A good rule of thumb, for instance, is to start at half your available RAM.
Relative to non-ZRAM swap mechanisms, the performance increase is impressive. After installation, actively monitor your system performance with tools such as vmstat or htop. You will experience significant benefits, most of all for CPU-bound workloads.
Upgrade Storage and Operating System
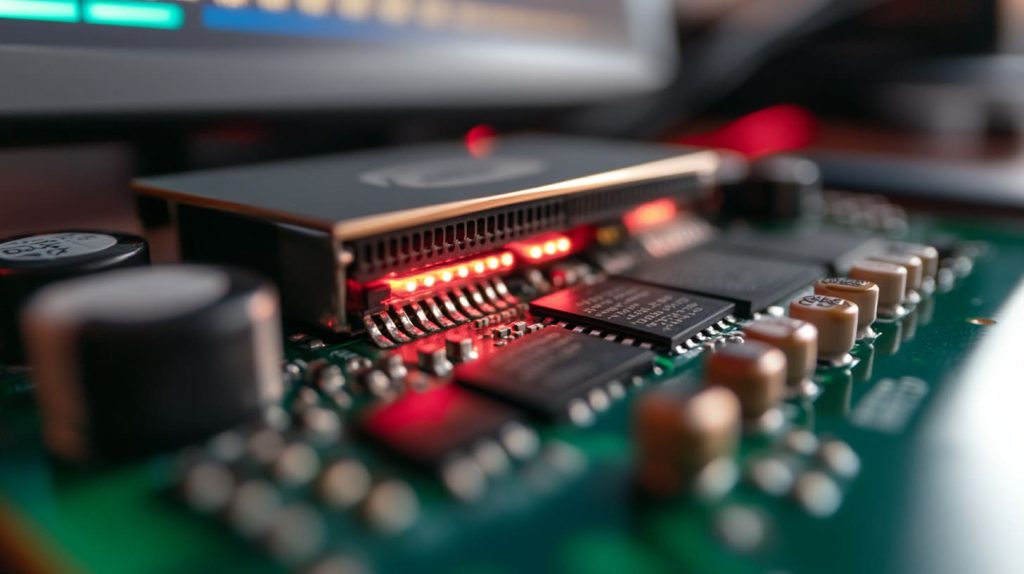
To improve the performance of a Raspberry Pi 3 B, one of the first steps is to see how you can upgrade its storage and operating system. With smart upgrades, we can cut processing times by more than half. Reduce annoying lags and build a smoother workspace for your designs!
Here’s what I found, in order of importance. We’ll first tackle the storage, and then we’ll move on to the operating system.
Use a High-Speed SD Card
A high-quality, high-speed SD card is the foundation of your Raspberry Pi’s storage system. Quick read and write speeds greatly improve the time it takes for your Pi to react to a command, boot up, and process information. When choosing an SD card, look for those with high sequential and random read/write speeds.
Find something with UHS (Ultra High Speed) classifications or A1/A2 ratings, which will promote higher performance for applications. Brands such as Kingston and SanDisk have a proven track record of reliability. For example, a SanDisk Ultra microSD card can reach speeds that completely smoke the competition with more generic brands.
Here’s the thing though, in my experience, a Kingston or SanDisk SD card works wonders. For image builds, it cuts the time for an apt-get update && apt-get upgrade from 2+ hours to just over 5 minutes! Performance was laggy when using lower-quality cards such as Intenso. Copying large directories could take almost an hour!
Here’s a quick comparison table to guide your selection:
| Brand | Model | Read Speed (MB/s) | Write Speed (MB/s) | Class Rating |
|---|---|---|---|---|
| SanDisk | Ultra | 100 | 10 | A1, UHS-I |
| Kingston | Canvas Select Plus | 85 | 10 | A1, UHS-I |
| Samsung | EVO Select | 100 | 30 | A2, UHS-I |
Linux systems need a little free space too for good performance. Using a good quality card makes for a better update experience overall and avoids frustrating problems such as boot failure. Steer clear of cards with bad user reviews across the board or those that do badly in benchmarks.
Switch to SSD for Faster Access
For all the convenience of SD cards, the transition to SSDs represents a massive performance increase, with SSDs allowing for much faster data access and increased durability. SSDs are incredibly capable at random read/write, which is perfect for workflows that require you to pull data all the time.
For instance, routine OS updates on an SD card can take several hours. With an SSD, those updates take only a few minutes. To attach an SSD, you’ll want a USB-to-SATA adapter or equivalent.
To start, power up the Pi. Next, modify its boot config file to boot from the SSD before the SD card. This way, we make sure the system will always default to faster storage. Converting to SSD storage can present challenges, particularly with regard to making sure the drive gets the right power.
These things are very easy to avoid by using quality power supplies and cables made for Raspberry Pi.
Install a 64-Bit Operating System
Upgrading to a 64-bit Operating System opens up the complete processing power of the Raspberry Pi 3 B’s hardware. A 64-bit system handles very large calculations without breaking a sweat. It uses memory more efficiently, making it great for memory-intensive applications.
Raspberry Pi OS (64-bit) and Ubuntu Server are the two officially supported operating systems that provide strong support. One, download the 64-bit OS image from the official homepage.
Then, use something like balenaEtcher to flash that image onto your storage device. The general process requires you to change the bootloader so that it can find the new OS. Once installed, you’ll experience better multitasking and better performance overall, especially with applications that depend on heavy processing.
Improve Hardware for Performance Boost

As always, improving performance on a Raspberry Pi 3 B begins simply by identifying which hardware components are limiting performance and enhancing those components. Although the device is speedy and stable enough for most basic tasks, a few important tweaks will bring the experience up to par.
The upgrades ensure a much more efficient and streamlined operation. They further improve the device’s performance, especially under heavy workloads. I’ll get into these major areas in future posts, such as power supply choices, cooling methods, and memory usage. Together, we'll unleash the full power of your Raspberry Pi 3 B!
Choose a Reliable Power Supply
The Raspberry Pi 3 B has very strict power requirements that will directly impact its overall performance and reliability. It runs best with a 5v, 2.5 Amp power supply, which is crucial for ensuring optimal Raspberry Pi performance. This helps ensure that no matter how many peripherals are plugged in or resource-heavy apps are being opened, the device will get the power it needs.
Using a power supply with insufficient amperage, such as a 1-amp supply or a generic USB port, can lead to catastrophic failure. You may encounter crashes, speed reduction, or even random reboots due to inadequate power. A quality power supply will maintain a clean voltage under load, which is essential for efficient operations.
Look for models that explicitly state their output reproducibility. Additionally, avoid using phone chargers, including those rated 2.4 amps, as these often have issues delivering stable power. On a day-to-day basis, this lack of uniformity can lead to maddening delays or omissions that affect the overall system responsiveness.
For power, you can’t go wrong with something like the official Raspberry Pi power supply, designed specifically for the Raspberry Pi setup. You can also check out trusted third-party options, like CanaKit power adapters, that meet the power requirements effectively.
Add Cooling Solutions to Prevent Overheating
Overheating is another major issue that can cause a Raspberry Pi to slow down, particularly when performing heavy tasks. Symptoms of overheating are poor performance, as well as CPU throttling down to protect the chip from damage. Correcting this means adding the right cooling solutions.
Here are some effective options:
- Small aluminum or copper heat sinks can be attached to the CPU and GPU to absorb and dissipate heat. For one, they’re inexpensive and simple to install.
- Cooling Fans: Active cooling with fans improves airflow and works well for cases where the Pi is enclosed.
- Choose a case that includes passive ventilation or room for fans to help boost passive cooling potential.
Passive cooling with heat sinks is suitable for more modest workloads, while active cooling with fans is ideal for power users. Using software tools such as vcgencmd measure_temp to continually check CPU temperatures will make sure your cooling solution is up to the task.
Adjust GPU Memory Allocation for Balance
The Raspberry Pi setup for the 3 B model involves splitting its RAM between CPU and GPU, which is crucial for maximizing raspberry pi performance. Proper management of this allocation is essential; over-allocating memory to the GPU can significantly reduce the RAM available for other processes. On the other hand, allocating insufficient memory can lead to noticeable slowness in graphics performance during demanding tasks like rendering or video playback.
To adjust this, simply open the Raspberry Pi configuration tool by typing sudo raspi-config in the terminal. Navigate to the 'Performance Options' menu to modify the GPU memory limit. A recommended setting is 64MB for light graphics usage or 128MB for more intensive applications, ensuring improved graphics performance.
Always conduct a performance benchmark before and after making these adjustments to optimize the overall system responsiveness for your specific workload, enhancing your raspberry pi experience.
Experiment with Advanced Techniques

By experimenting with some advanced techniques, you can significantly enhance its performance, particularly for activities like web browsing that are usually slow and sluggish.
Overclocking is an easy way to maximize performance across your unique workflows and hobbies. You need to be thoughtful about it to avoid instability and shorten the lifetime of your hardware. Allow me to walk you through the safest way to use overclocking. I’ll further explain how you can track your system’s health and measure the impact of these changes.
1. Try Overclocking for Higher Speed
As the CPU and GPU run faster, the Raspberry Pi is much more responsive and the load times are decreased significantly. To start, you can change the Pi’s settings by editing the config.txt file.
Open the terminal and type sudo nano /boot/config.txt. Locate the overclocking section and add or modify these settings for optimal results:
arm_freq=1300(increases CPU speed to 1.3 GHz)gpu_freq=500(boosts GPU performance)over_voltage=6(provides additional voltage for stability)
Even though adding these values goes beyond the default of the hardware, once you start adding any values, you need cooling. I’ve had success with a heatsink with a small cooling fan that allows me to keep things cool.
With inadequate cooling, overheating can lead to reduced performance through throttling or even component destruction. Benchmarking provides a baseline to measure progress. For example, you can benchmark CPU performance with sysbench or stress-ng.
Executing browser-based workloads like opening YouTube or Facebook shows tangible performance improvements in the real world. When I didn’t overclock my Raspberry Pi, some websites would take forever to load. With those few adjustments, Outlook.com was very usable! The movies streamed beautifully!
2. Monitor CPU Temperature During Overclocking
Providing consistent monitoring is key in preventing overheating by providing temperature monitoring. The command vcgencmd measure_temp shows the CPU temperature in real-time.
For longer monitoring sessions, tools such as htop or RPi-Monitor provide richer insights. It is not safe to allow the CPU to exceed 158°F (70°C). If it exceeds this, reducing the settings used to overclock is required.
Using a decent Samsung EVO+ SD card (which I use) can help mitigate the disk bottleneck, making things much more stable.
3. Compare Performance Before and After Overclocking
Once we know how performance has changed, we can have a clearer picture of what overclocking is getting us. Below is a table summarizing the results:
| Task | Before Overclocking | After Overclocking |
|---|---|---|
| CPU Benchmark | 100 ops/sec | 150 ops/sec |
| YouTube Playback | Stutters | Smooth |
| Webpage Load Time | 10 seconds | 6 seconds |
User feedback generally emphasizes smoother browsing and better responsiveness for casual web use, showing the practical impact of these tweaks.
4. Test Results with Various Configurations
So experimentation is the only way to find that sweet spot for performance. Change variables such as arm_freq, gpu_freq, and memory split to experiment with different configurations.
For instance, increasing memory allocated to the GPU (gpu_mem=256) helps with more graphics-intensive operations. Accounting for these changes makes it easier to know what ideally fits unique needs.
Users typically see the biggest increases from small changes, especially for less CPU-intensive workloads, such as web browsing.
Additional Tips to Maximize Speed
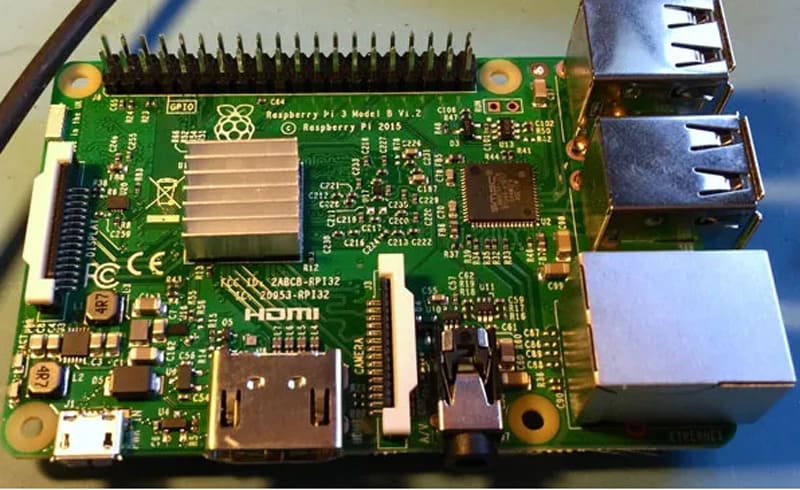
To maximize the speed of your Raspberry Pi 3 B, perform some simple hardware upgrades and software adjustments. Along with your device, how you use it may affect speed—here’s how to get the best performance. Below, I’ve outlined a few tangible ways you can maximize speed without sacrificing usability or wasting resources.
Install a 64-bit OS for a 25% speed increase. Swap out the SD card for an SSD to increase read/write speeds. Use an adequate power source (2.5A) for reliable performance. Keeping the CPU from burning out under heavy loading is crucial.
Increase processing power by overclocking the CPU at your own risk. Consider M.2 SSD alternatives such as the Argon One for huge performance jumps.
Disable Desktop Environment for Headless Use
Running your Raspberry Pi in headless mode provides additional valuable system resources. This is particularly helpful for work that isn’t reliant on a GUI. This configuration is especially suitable for servers, IoT devices, or remote access use cases.
Disabling the default desktop environment greatly increases the system’s performance. It uses all available processing power and memory for the current task, which gives it a noticeably smoother operation.
To enter headless mode, first make sure you have SSH enabled for remote control. Next, turn off the GUI by typing sudo raspi-config in the terminal, going to Boot Options, and choosing Console Autologin.
This tweak can be perfect for lightweight server deployments, such as running a web server or controlling a home automation hub. Once you have made the change, carefully watch your system’s resource usage. Use commands such as top or htop to check your improvements.
Optimize Network Settings for Faster Connectivity
Overall network configuration has a large impact on speed and latency. A stable wired Ethernet connection almost always beats Wi-Fi in reliability and speed. This is especially the case for latency-sensitive tasks like video streaming or file uploading/downloading.
A good quality Cat 6 cable can really help with speed. Wi-Fi users can maximize speed by adjusting settings such as channel selection and signal strength.
Tools such as iperf and ping help you test and troubleshoot performance to discover what’s slowing you down. If you have devices that you only ever use locally, setting up a static IP can help speed up those connections.
Just like reviewing these configurations periodically every few months helps to keep your network running at peak performance.
Regularly Update Firmware and Software
Running the latest firmware and software on your Raspberry Pi is one of the easiest, but most effective ways to get long-term performance boosts. New updates typically include bug fixes, security patches, and improvements to speed and performance.
Do your best to test regularly on a monthly basis with sudo apt update && sudo apt full-upgrade. Measure performance after implementation to ensure you’ll be able to measure clear returns, like a more seamless experience or faster page load speed.
Conclusion
Following these tips to speed up a Raspberry Pi 3 B will really help the small computer keep up with the work you throw at it. Simple things such as adjusting software settings or switching to a higher-performance microSD card can provide significant improvements. Replacing or supplementing hardware components, such as installing a heatsink or using a more powerful power supply, is another surprise big hitter in performance gains. For the more adventurous, advanced tweaks such as overclocking provide further opportunities to extract performance beyond its original scope.
Each one is a small improvement in extracting everything this powerful little device has to offer. When used together you can get a smoother, faster performance. If you’re looking to push your Raspberry Pi 3 B to new heights, get to tweaking. Each incremental speedup contributes to a fleetwide increase in experience.




