Skip to content

When the first time I tried to assemble a microcomputer in my cramped bedroom. I had a bunch of loose circuit boards, wires tangled around my feet, and an irrepressible curiosity. That curiosity grew into a passion, and it led me to discover the magic of building a machine that fits in one hand yet accomplishes so much. Now, whenever someone asks me why I bothered going through all that effort, I tell them this: it’s a thrilling ride that helps me learn every step of the way, from hardware intricacies to software surprises.
Why Build Your Own Microcomputer?

I have always believed that real power comes from knowledge. A custom microcomputer grants me that knowledge in spades. I can pick each component with care. I can see how the CPU, storage, and all those tiny parts work together. Some folks might say it’s easier to buy a prebuilt system. But I ask myself: Would I learn as much about optimizing resources or solving hardware glitches if I never got my hands dirty? Probably not. Building a microcomputer, even if it resembles a Raspberry Pi, nurtures my ability to think critically. It shows me how different configurations can deliver unique results.
And yet, I also question if it’s worth the time. Maybe there’s a simpler route? From my perspective, diving into the details helps me see pitfalls early on. Is the CPU powerful enough for my tasks? Do I need more memory? Should I get a better power adapter? These questions keep me alert, and that sense of discovery keeps me going.
What Makes a Microcomputer Like Raspberry Pi Unique?

I used to believe all microcomputers were the same, but I quickly realized the Raspberry Pi stands out. It’s more than just a small circuit board. It boasts a strong community and a massive library of resources. The unique aspect, in my eyes, is the combination of accessibility and adaptability. It’s so easy to get your hands on expansions, enclosures, and modules that fit a Pi-like board. But we shouldn’t overlook alternatives. Maybe a Raspberry Pi isn’t the perfect fit for every project. So I weigh the pros and cons. Price, availability, and performance each play a part in my decision.
I often challenge myself to consider the flip side too. Is its popularity overshadowing potentially better boards? Should I try a lesser-known option that might offer specialized features, like advanced graphics or more GPIO pins? These sorts of probing questions help me stay objective. Now, let’s move on to the foundation of how these systems actually work.
Understanding the Basics of Microcomputer Architecture

Before I assembled my first microcomputer, I had no idea how a CPU or SoC truly operated. I just knew they processed information. Once I dove in, I understood that architecture is more than just hardware. It’s how each piece communicates to create a seamless experience.
Central Processing Unit (CPU) and System on a Chip (SoC)
A CPU is that tiny sliver of silicon responsible for the core computations. But in microcomputers like the Raspberry Pi, there’s often a System on a Chip (SoC). It includes the CPU, GPU, and other vital components on one chip. I learned to compare clock speeds, core counts, and thermal design power. For instance, a single-core SoC can run basic tasks but might struggle if I try to do heavy video processing. Meanwhile, a quad-core SoC can handle more workloads simultaneously but might demand better cooling. Critical thinking kicks in here: I reflect on the actual tasks I plan to run. If it’s just for a small server, maybe I don’t need top-tier horsepower. But if I’m streaming HD video, I weigh the performance benefits against the extra cost.
Memory and Storage Considerations
RAM and storage are more than afterthoughts. They’re the bedrock of smooth performance. With limited RAM, my system might hang when I push it too far. If my eMMC or SD card is slow, I face long boot times or sluggish file transfers. From a different angle, do I really need the fastest memory if all I’m doing is checking email? Perhaps not. It’s a balance. One example: I used to store my media on a single SD card, but it filled up fast. Now I keep an external drive handy for large files. It’s a small shift that keeps the microcomputer tidy and functional.
Input/Output (I/O) Interfaces
I admit I used to ignore these. Then I realized I needed a reliable way to connect sensors, cameras, or external keyboards. Each I/O interface, whether it’s USB, GPIO, or HDMI, can shape the scope of my project. If I’m prototyping a sensor array, I’d want more GPIO pins. If I’m turning the board into a media center, I’d focus on HDMI output. This is where we ask: “What am I really trying to build?” That question lets us choose the right I/O without being overwhelmed by unused ports.
Power Management Essentials
Ever tried to power a board with a flimsy adapter and ended up with random reboots? I have. I learned the hard way that stable power is non-negotiable. The board’s voltage tolerance matters. Undervolt and you risk losing data or damaging components. Is it an obvious consideration? Maybe not until you experience random shutdowns. Now I always keep a table like this in my notes, matching the board’s recommended voltage and current:
| Board Model | Recommended Voltage | Recommended Current |
|---|---|---|
| Raspberry Pi 4 | 5V | 3A |
| Raspberry Pi Zero | 5V | 1.5A |
| Banana Pi M2 | 5V | 2A |
I encourage everyone to think critically about power. Not all boards have the same requirements. Overlooking this can ruin even the best-laid plans.
I still smile when I recall my board shutting off mid-video stream. That mishap taught me the value of a stable power supply. Let’s now move to the parts that make all of this possible.
Essential Components for Building a DIY Microcomputer

I’ll never forget the time I pieced together a microcomputer, only to discover I missed a proper Wi-Fi module. I had to scramble to fix that oversight. It’s best to plan your components in advance.
Motherboard or Single-Board Computer (SBC) Selection
Choosing the right SBC feels like picking the perfect car. Do I want fuel efficiency or raw horsepower? Some SBCs lean towards raw performance with higher clock speeds. Others emphasize low power consumption. From another viewpoint, maybe I prize community support. If an SBC is obscure, I might not find tutorials or help when something breaks. I compare these perspectives in a simple but effective matrix:
| SBC Option | Performance | Power Efficiency | Community Support |
|---|---|---|---|
| Raspberry Pi 4 | High | Moderate | Huge |
| Banana Pi M2 Zero | Moderate | High | Medium |
| Orange Pi 3 LTS | High | Moderate | Growing |
Power Supply and Power Adapter
I once tried using my phone charger on an older board, and it worked... until it didn’t. The power adapter choice might sound trivial, but it’s the difference between stable performance and random quirks. I think about voltage regulation and total wattage. If a project grows over time, I need extra overhead to avoid upgrading the adapter later.
Connectivity Modules (Wi-Fi, Bluetooth, Ethernet)
Connectivity is often the gateway to real-world applications. Wi-Fi and Bluetooth are convenient, but can they handle the interference in my home environment? Ethernet is stable, yet it tethers me to a cable. I weigh each option’s pros and cons. For example, if I plan to build a small robot, I might prefer Wi-Fi or Bluetooth for mobility, but that forces me to handle potential signal drops. My approach is always to test in a real setting—like the basement or backyard—so I see the practical side, not just the theoretical specs.
Heat Management: Heat Sinks and Cooling Fans
Overheating can render the system sluggish. Some boards throttle CPU speeds if they hit high temperatures. At first, I thought passive cooling (like a simple heat sink) was enough. But I realized if I push the device to its limits—such as when streaming or doing video processing—active cooling or a decent case with airflow is crucial. On the other hand, if my usage is light, a modest heat sink can suffice. That’s why I consider the intended workload before I pick a cooling solution.
Optional Expansion Parts (Displays, Cameras, Sensors)
Not all microcomputers need a display or camera, but adding them changes the projects you can tackle. Last year, I attached a camera module to experiment with facial recognition. It was fascinating but also demanding on CPU and memory. From an alternate standpoint, maybe I only need a sensor array for temperature and humidity data. In that scenario, a camera is overkill. I always try to match expansions to my immediate and near-future goals. Why purchase hardware I might not use?
Are you still with me? Great. Next, I’ll dive into how to pick the right board from the many options out there.
Selecting the Right Board

I once ended up with a board that had fantastic specs on paper, only to find out it lacked a strong support community. That might not seem like a big deal, but trust me—it’s painful when you’re stuck and no one’s around to help.
Popular SBC Options and Their Key Differences
SBCs like Raspberry Pi, Banana Pi, and Orange Pi each come with unique selling points. The Pi brand often wins with strong documentation and an active forum. Banana Pi might offer a more balanced approach in terms of power usage. Orange Pi can sometimes deliver higher specs at a lower price. I look at real-world benchmarks, but I also peek at user forums to see if other enthusiasts share issues or solutions. This multifaceted approach helps me avoid being blinded by marketing claims.
Processor Speed, RAM, and GPU Capabilities
If I plan to run computationally heavy tasks, I check CPU benchmarks. If I’m building a media center, I keep an eye on GPU support. If I just want a small server for personal storage, then CPU and GPU might not be as critical. From a different angle, memory can also be a bottleneck. Even with a powerful CPU, a board with too little RAM might crawl under heavy multitasking. In short, I weigh each resource in context. Overemphasizing one aspect while ignoring the rest can lead to lopsided performance.
Community Support and Documentation
During my first project, the only thing that saved me from utter confusion was a community forum. That’s why I emphasize this so much. Comprehensive documentation can save hours of guesswork. A large user base often translates to better tutorials, libraries, and troubleshooting guides. On the flip side, a board with minimal documentation might require guesswork or deep technical knowledge. I find it helpful to check user reviews. They often reveal hidden pitfalls.
Budget and Long-Term Availability
Prices fluctuate, and older boards can be discontinued. That’s why I consider both immediate cost and how easy it will be to replace the board or find spares down the road. If I’m developing a product for long-term deployment, availability matters. And that’s where balancing financial constraints, performance, and future-proofing becomes an art. I once bought a cheap board that was discontinued months later. It was fine for a personal experiment, but for a bigger project, that might be disastrous.
Now, with a board in hand (or at least in mind), the next step is to pick and install an operating system.
Choosing and Installing the Operating System

I’ve found that the OS can make or break my experience. I recall testing a lightweight Linux distro that loaded in seconds, which felt so refreshing. But I also tried a full desktop environment that hogged system resources.
Overview of Common OS Choices (Linux Distros, Android, etc.)
Linux distributions are popular for microcomputers. Some are tailored specifically for SBCs, like Raspberry Pi OS. Others, like Ubuntu or Debian, can be adapted too. Android is an option for those who want a more familiar interface or Google Play apps. The question I ask is: Am I aiming for a server environment, a development machine, or a media center? That helps me select an OS with the right balance of features and resource usage. For instance, a minimal OS might be best for a headless server, while a user-friendly GUI could be ideal for a media center.
Preparing a Bootable SD Card or eMMC
I still remember the first time I “burned” an image file onto an SD card. I expected an intuitive process, but I stumbled upon different formatting tools and partition managers. It’s straightforward once you get the hang of it, but it can be intimidating initially. The critical piece is to ensure the card or eMMC is compatible with the board. Then I use a reliable image writing tool and confirm I’m using the correct image file. This might sound trivial, yet mistakes here can cause a lot of confusion.
First-Time Configuration and Boot-up Steps
If the board doesn’t power on or display anything the first time, it’s easy to panic. But I learned to keep calm, double-check the cables, and read the logs if possible. Simple steps like changing the default username and password can boost security. Then I customize the display settings, locale, and Wi-Fi credentials. I might ask myself: “Is there a better way to automate these steps for future deployments?” That’s how I ended up creating a small config script that runs at boot. It’s the small details that save time later.
Troubleshooting Common OS Installation Issues
I once typed the wrong device path in my image flashing tool, and I accidentally wiped an external hard drive. That was unpleasant. Now I triple-check. Common issues include corrupt SD cards, incompatible firmware, or insufficient power leading to a partial boot. Viewing error logs can be revealing, but they can also be cryptic. My strategy is to keep a second computer nearby for research and to test alternative OS images if needed. Different vantage points often clarify the problem.
I hope you still find this journey interesting. Next, let’s explore how we can create a stylish or functional home for our board.
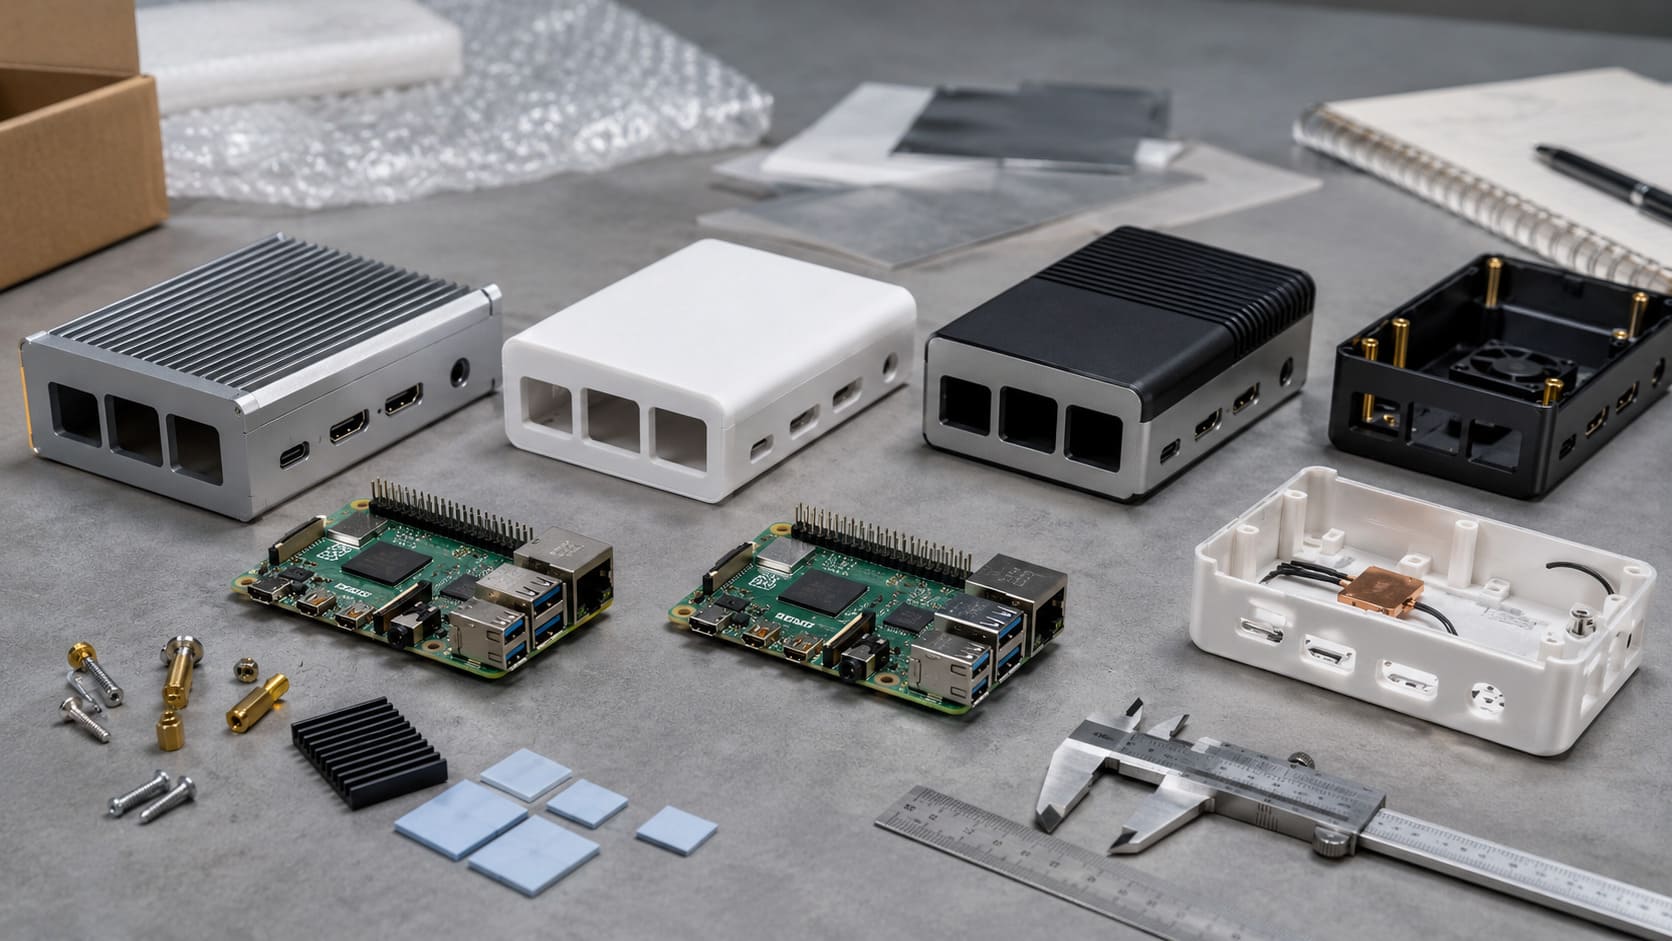
Customizing the Enclosure and Cooling Solutions

Years ago, I housed my first microcomputer in a simple plastic container. It was cheap and quick, but it lacked proper ventilation. Overheating became a frequent nuisance. That’s when I realized how crucial enclosures can be.
Importance of a Well-Designed Case
A good enclosure doesn’t just look pretty. It shields the board from dust, manages airflow, and can even reduce noise. However, I’ve seen people slap on any box they find. From another perspective, that might be fine for casual use. But if you’re building a product to resell, the enclosure is part of your brand identity. It communicates quality, attention to detail, and durability. I like to test how easy it is to remove or replace components. Nothing is worse than disassembling half your case just to attach a single cable.
Materials and Custom Logos/Branding
Plastic, aluminum, or even wood can be used. Each has pros and cons. Aluminum dissipates heat better, but it might drive up costs. Plastic is lightweight and affordable, but less efficient at heat transfer. Sometimes, I want to add a custom logo or design. That’s where laser engraving or printing can turn a generic box into something unique. I always consider whether the design complements the hardware layout. Logos look great, but not if they block vents or connectors.
Passive vs. Active Cooling Strategies
I’ve tried both. Passive cooling can be quiet and maintenance-free, but it might struggle under heavy loads. Active cooling, using small fans or blowers, can handle more heat but introduces noise and adds another point of failure. Critical thinking nudges me to weigh how often I’ll push the CPU. If it’s a headless server mostly at idle, maybe passive cooling is enough. If I plan to max out the CPU or GPU, I lean toward active cooling. In one scenario, I used a large passive heat sink that worked well in my mild climate. But in a hotter environment, a small fan might be more reliable.
Tips on Designing or Modifying Existing Case Blueprints
Not everyone wants to design a case from scratch. Sometimes, it’s fine to pick an existing blueprint and tweak it. I like to experiment with 3D-printed prototypes or quick laser-cut cardboard versions. That approach gives me immediate feedback on whether the ports align well or if I need extra vent holes. It’s a tangible, hands-on process that helps me refine the final design. I remind myself to confirm the dimensions of each board revision because even minor changes can affect port alignment.
Enclosures can be an art form in themselves. Let’s shift focus to the software side now, so we see the bigger picture of a fully configured microcomputer.
Software Setup and Configuration

Software configuration is where I breathe life into the microcomputer. With the operating system in place, it’s time to install the essential drivers, security patches, and whatever else I need.
Installing Essential Software and Drivers
Installing software can be as simple as typing a few commands. But I try to confirm each package I install. Do I trust the source? Do I really need it? I also watch out for hardware-specific drivers, particularly for GPUs or wireless modules. A mismatch or an outdated driver can cause random crashes. When I’m dealing with new expansions—like a special camera—I read the documentation carefully. And I think critically about version compatibility. That small detail can determine whether the camera works flawlessly or refuses to function at all.
System Monitoring and Updates
I don’t like being in the dark about system health. So I install monitoring tools that show CPU load, temperature, and memory usage. If something spikes unexpectedly, I want to know. Updates are a double-edged sword. They can fix issues but also introduce new bugs. I back up critical data or create an image of the SD card before major upgrades. That backup has saved me more than once. Looking at it from another angle, skipping updates can leave the system exposed to vulnerabilities. So I aim for a balanced approach—test first, then update.
Security Best Practices and Firewalls
Even though it’s just a small board, it’s still a computer on my network. That means it can be hacked or infected. I change the default passwords, enable firewalls, and sometimes set up SSH keys for remote access. These steps sound basic, but you’d be surprised how many folks skip them. I recall reading about open ports on public IP addresses that led to unwanted intrusions. So I treat every board like any other machine that needs protection.
Network Configuration (LAN, Wi-Fi, Remote Access)
I enjoy controlling my microcomputer remotely, especially if it’s tucked away. I use secure protocols like SSH or VPN tunnels. Setting up Wi-Fi can be tricky if the environment has complex security requirements. Sometimes, I prefer a wired LAN for stability. But that’s not feasible in every setup. The critical thinking angle: weigh convenience (Wi-Fi) against reliability (Ethernet). My personal trick is to keep a spare USB-Ethernet adapter around. If wireless ever fails, it’s nice to have a fallback.
There we go. Now let’s explore testing and maintenance to ensure our microcomputer remains healthy over time.
Testing, Troubleshooting, and Maintenance

I’ve had boards run flawlessly for months, only to develop odd quirks once dust collects or software updates break compatibility. Proactive testing and maintenance reduce headaches.
Basic Diagnostic Tools and Techniques
I like to run stress tests that push the CPU, GPU, and memory to their limits. It reveals potential overheating or unstable power. Command-line tools like top or htop show me resource usage. I also check system logs for hidden errors. If a board passes these checks, I feel more confident. From another viewpoint, though, I don’t want to overstress older hardware and risk damaging it unnecessarily. So I tailor tests to the board’s capabilities.
Common Hardware Issues (Short Circuits, Overheating)
I once had a small metal screw roll under my board and cause a short circuit. It was a scary moment. Now I keep my workspace organized. Overheating is another big one. When a CPU hits high temperatures, it throttles performance or shuts down. That’s why I check for proper ventilation. If I suspect an overheating issue, I measure temperatures under load. If they exceed safe limits, I reevaluate my cooling solution. It’s a never-ending learning curve.
Software-Level Debugging (Logs, Command-Line Utilities)
Logs can be intimidating, but they’re also a goldmine of information. When I see weird behavior, I run commands like dmesg or journalctl to uncover hints. Sometimes it’s a missing driver, other times it’s a conflict between installed packages. Approach this from different angles: maybe one package version is clashing with another. Maybe hardware is failing. Debugging requires patience, but it’s immensely satisfying when you crack the code.
Ongoing Maintenance and Firmware Upgrades
Firmware updates can unlock new features or fix hardware-level bugs. Yet, I always read the release notes. If an update is minor and my system is stable, I might delay it. But ignoring upgrades for too long can leave me vulnerable. It’s about balance. I keep a record of any changes I make, so I can roll back if something breaks. This practice feels tedious, but it saves me from guesswork down the line.
Conclusion

Recap of Key Takeaways
Building a microcomputer is more than placing a few parts together. It involves knowing how the CPU and SoC interact, why memory and storage matter, and which operating system suits your needs. It’s about considering enclosures, cooling strategies, and the never-ending dance of updates and maintenance. Above all, it’s about learning through every success and failure along the way.
Next Steps for Expansion and Scaling
Once you’re comfortable with a simple build, maybe it’s time to explore edge AI projects or high-end multimedia streaming. Or design a custom case that reflects your personal brand. If you’re in business, you might scale these boards across multiple deployments. The key is always to keep your goals in mind and adjust each step accordingly.
Final Thoughts on Customizing Your DIY Microcomputer
I’ve seen tiny boards power everything from home automation setups to creative art installations. The journey can be messy, but it’s also deeply rewarding. If someone had told me long ago I’d be building these devices—and sometimes messing them up—I might’ve laughed. But every mistake taught me something valuable. I hope you find the process just as enlightening. So go forth, explore, and build a tiny machine that mirrors your vision.