
3D printing and modeling a Raspberry Pi case is the only way to create an enclosure design that will securely protect your Raspberry Pi!
Using tools like 3D modeling software, you can create cases tailored to specific needs, whether for ventilation, access to GPIO pins, or aesthetic preferences.
Materials like PLA or ABS are popular for 3D printing, providing toughness and versatility.
Our guide to designing your very own Raspberry Pi case dives into the design process and how to think about making the perfect case for yourself.
Why Model a Raspberry Pi Case?

By designing and modeling a case for your Raspberry Pi, you’re not only protecting the device. You improve its protection, functionality, and overall look. A well-thought-out case can shield sensitive components, improve usability, and reflect your personal creativity, making it an essential aspect of any Raspberry Pi project.
Here’s a look at the advantages of and things to think about when making your own case.
Benefits of Custom Case Design
There are distinct advantages to designing a custom case that aren’t always found with off-the-shelf options. You can incorporate specialized features to enhance performance. For instance, add ventilation openings to control airflow or light pipes to improve LED visibility.
Including a cheat sheet for GPIO pin configurations or connection ports directly on the case adds practical value, making it easier to work with your Raspberry Pi. Consider a removable top or a hinged design to make maintenance or future upgrades more accessible.
From a usability perspective, customizing the case to meet the exact needs of your project will floor you. For example, a robotics project might benefit from mounting brackets, while a media center setup could require precise cutouts for HDMI and USB ports.
Customizing the case allows you to balance cost-effectiveness with material selection. 3D printing in PLA, ABS, or even wood offers versatile and budget-friendly options.
Protecting Your Raspberry Pi
No doubt, the importance of a case is to keep your Raspberry Pi protected from the elements. If exposed, dust micro-particles can clog the board’s heat dissipation system, creating overheating and short circuits. A properly designed case offers good protection without trapping heat by restricting airflow, even with dense hardware like that.
Engineering choices such as 0.016-inch clearances make sure everything fits snugly without taking away from the ease of use. Protection goes beyond just covering up a pretty surface. A case built from tough molds like polycarbonate offers additional protection to the Raspberry Pi.
First, it protects the device from unintentional drops and knocks. Adding design touches such as thick rubber feet or a wide base goes even further to solidify their safety.
Project Personalization and Aesthetics
When designing a case, you have the complete freedom to allow your creativity to run wild. Play around with colors, shapes, and textures to convey your aesthetic needs. Whether you prefer smooth curves and subtle tones or vibrant color, there’s a style for you!
Materials such as clear acrylic or textured PLA can even produce an impressive multicolor effect, highlighting the Raspberry Pi’s internal hardware. This process becomes an educational experience in itself, fostering innovation through exploration of prototyping, iteration, and design fundamentals.
Essential Tools and Materials

Whether you’re designing a Raspberry Pi case for fun, graduation projects, or a more serious endeavor, it all starts with an idea. Whether you are new to 3D modeling or well-versed in fabrication, getting the fundamentals down is crucial. It ensures that your case will be both functional and visually striking while ensuring its longevity.
Here’s how we’ll walk you through the tools, materials, and software that will be required to take you from start to finish.
Software Options for 3D Modeling
Selecting the right 3D modeling software is key to designing a Raspberry Pi case that fits precisely and meets your needs. For the total newcomer, Tinkercad provides a good entry point with a simple Intel-developed interface that lets you make basic models in minutes.
On the other hand, Fusion 360, which is better for users with a little more experience, offers powerful CAD tools ideal for more complex projects. It's robust ability to read.SLDASM files make it a compelling option for Raspberry Pi case design.
For experienced users, FreeCAD offers powerful tools for full customization and the flexibility of open-source architecture, perfect for detailed, unique, and industry-ready models.
Key features to consider include:
- Tinkercad: Browser-based, beginner-friendly, limited advanced tools.
- Fusion 360: Parametric modeling, cloud collaboration, supports.SLDASM files.
- FreeCAD: Open-source, customizable, steep learning curve.
Recommended 3D Printing Materials
By selecting an appropriate filament, you can make sure your Raspberry Pi case will go the distance and be highly functional. One of the most common thermoplastics used in 3D printing is PLA, largely because it’s user-friendly and biodegradable, but it lacks heat resistance.
ABS, conversely, provides more strength and thermal stability, but needs an enclosed printing environment. Polyamide, or nylon as it’s more commonly referred to, provides the greatest design freedom. It’s a notable one because it’s the overall best choice, used 90 percent of the time.
| Material | Durability | Heat Resistance | Ease of Use |
|---|---|---|---|
| PLA | Moderate | Low | High |
| ABS | High | High | Moderate |
| Polyamide | Very High | Moderate | Moderate |
2 mm-thick clear plastic sheet is ideal for throwing together quick light pipes but providing a nice, clear, and durable finish.
Necessary Tools for Assembly
To assemble your Raspberry Pi case, you will need some general and specific tools and materials. Essentials include a 2.5mm screwdriver for tightening screws.
Hot melt glue is useful for connecting cardboard components. Safety gear, such as gloves and goggles, guarantees safety while assembling. A 5mm drill makes cleared screw holes for repeatable accurate design.
A clearance of 0.015 inches is a good rule-of-thumb to make sure there’s a good fit for most material types.
Key Design Considerations

Creating the perfect Raspberry Pi case is no easy task. This holistic approach ensures the final product accomplishes the design goals of being functional and aesthetically pleasing. Don’t forget to meet the short-term requirement of housing the equipment.
On top of that, consider future-proofing for upgrades or changes down the road. A smartly executed case marries functionality with an elegant aesthetic. It is perfectly tailored to the unique requirements of the Raspberry Pi as well as those of its owner.
1. Measure Raspberry Pi Dimensions Accurately
Getting the correct dimensions is the basis of a winning case design. Start by determining the length, width, and height of your specific Raspberry Pi model. Remember to factor in items such as GPIO headers and any fitted heatsinks into your measurements.
Leave a clearance of around 0.016 inches (0.4 mm) for most materials to prevent a too tight fit. For materials that shrink very little, plan for 0.012 inches (0.3 mm) of clearance. Use the official Raspberry Pi specifications as a guide and make a punch list to avoid missing any important measurements.
For example, specify the board stack-up and highest component Z-heights. As with anything, make sure to check your dimensions multiple times, because a tiny miscalculation could result in a case that doesn’t fit right.
2. Plan for Port Accessibility
User centric port accessibility is a key component to usability. Make sure your design features accurate cutouts for every port you need—USB, HDMI, power, GPIO pins, and more. These cutouts cannot interfere with adjacent parts or wires.
To help plan your design, write out your Raspberry Pi ports and where they’re physically located. Design to make it easy to plug in and unplug devices without straining connectors.
3. Design for Ventilation and Cooling
Thermal management is another key design consideration. Include ventilation grills or holes. Create a design that will allow enough airflow and prevent overheating.
When active cooling is in use, direct the fan. Ensure that it works well with the airflow design of the enclosure. Passive cooling, such as heatsinks, is most effective with direct exposure to outside free and open air.
Finding the right balance among these strategies will get you to the goal of maximum efficient cooling.
4. Consider Mounting Options
Counterbore holes on internal-facing points to help support the Raspberry Pi without risking damage from over-torquing. Possible solutions are screws, standoffs or snap-fit features.
Keep maintenance in mind, making it easy to access the lights while maintaining them.
5. Factor in Assembly and Disassembly
Consider the ease of assembly and disassembly to allow for updates or cleaning. For example, screw placements and snap-fit parts should provide access without having to worry about breaking the physical component.
For really nice prints, go with a layer height of at least 0.08 inches (0.2 mm). Pair this with 20-30% infill to get a good but resource-efficient use of material.
Step-by-Step Modeling Guide

Making a Raspberry Pi case is incredibly satisfying because you can mix practicality and invention. By dividing the project into clear, simple steps, you can create a 3D model of a desktop computer case that feels less daunting and more achievable. This tutorial will guide you through designing a simple case for the Raspberry Pi 4 Model B using Fusion 360, enhancing your design options and precision.
1. Create a Basic Enclosure Shape
Step 1: Download the CAD Model of Raspberry Pi 4 Model B.
Using a CAD model will help you make sure you have the correct reference dimensions. Then, in Fusion360, select the XZ plane and right-click to make a sketch.
Draw the case outline using basic geometric shapes like rectangles or rounded rectangles to define the case footprint. Keep in mind to leave a gap of approximately 0.016 inches (0.4 mm) for the Raspberry Pi. This helps avoid a rub-your-nose-in-it fit.
With the extrusion tool, pull the enclosure’s outline up to create its basic form. This base will be the starting point for higher detailed features such as cutouts or mounting points.
2. Add Cutouts for Ports and Connectors
For devices that utilize cutouts, correctly placing them is very important to usability. Use the CAD model to check the measurements and get the accurate measurements and locations of the Raspberry Pi’s ports.
Use a technical sketch tool to create detailed sketches of these cutouts and use extrusion to subtract that material. Take something as simple as the HDMI and USB ports—those need to match up exactly to avoid interference.
Once you’ve added the cutouts, check the fit by doing a virtual test of placing the Raspberry Pi inside your model. This critical step prevents surprises by making sure every single component can be reached and operated smoothly.
3. Incorporate Ventilation Features
There is no argument, effective cooling is very important to keeping the Raspberry Pi running at peak performance. Add ventilation design elements like slotted vents or even a mesh pattern styled into the case’s top or sides.
Prototype different designs to maximize airflow efficiency without jeopardizing structural integrity. Take polyamide as an example, a material famous for its design versatility, enabling complex ventilation designs as well as complex aesthetics, without sacrificing material strength.
These features make each case much harder to overheat without weakening the case’s durability.
4. Design Mounting Points
External features aside, securely mounting the Raspberry Pi in your design is equally important. Design zones with threaded inserts or clip systems to mount the board securely.
Make sure these mounting points match the Raspberry Pi’s PCB and gold rings. Further test the stability of these features by simulating installation and removal to confirm that ease of use and durability are properly designed into the product.
5. Refine the Design for Aesthetics
The last stage is improving the overall visual impact of the case. Play around with textures, patterns, and color combos to create something that stands out from your competition.
A great example of this is using super smooth finishes in conjunction with fine, detailed etching to achieve a modern, polished aesthetic. Polyamide’s flexibility and strength back these graceful touches, performing both aesthetic and functional roles.
Designing the full case first and then dividing it down the middle allows for smooth fitment and Build/Assembly along the way.
Optimizing Thermal Performance
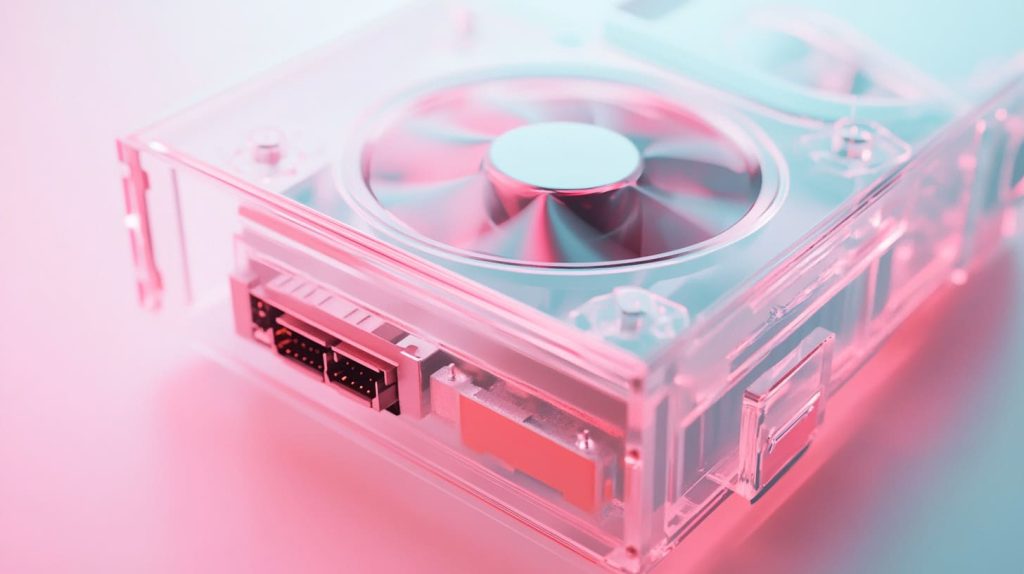
Keeping temperatures as low as possible is of the utmost importance when creating a Raspberry Pi case. Inadequate thermal management can cause device throttled performance or even hardware failure, making effective thermal performance critical for device reliability.
The case design features an aesthetic but crucial role in heat dissipation, affecting airflow directivity, laminar material usage, and work envelope cooling research. It’s true that testing and refining your design can optimize thermal performance,e but that’s why it’s very important to think beyond one strategy.
Passive Cooling Strategies
Passive cooling heats up the design of the case itself, allowing it to dissipate heat naturally. One innovative approach is to build ventilation slots or holes into the case. These additional vents provide a natural place for hot air to escape.
Simultaneously, they pull in cooler air, producing a self-generating natural circulation effect without any mechanical moving parts. For example, strategic placement of vents around the Raspberry Pi’s CPU or addition of a power supply vent increases airflow to prevent excess heat accumulation.
Materials—The best materials to use are metals like aluminum because they conduct heat better than plastic. This is because an aluminum case is a very effective conductor that can help pull heat away from the SBC.
It subsequently exchanges that heated air with the nearby environment. Pairing this with a brushed or ribbed surface allows for even more surface area to increase heat dissipation.
Where the Raspberry Pi sits inside the case plays a role. Don’t place the board too close to opaque walls that can hold in heat. Raising the mounting point, or even better, using a case that has a raised base, increases airflow under the board.
This assembly advancement further optimizes passive cooling.
Active Cooling Integration (Fan Options)
Adding fans to your case design gives you active cooling, which can significantly reduce temperatures. Fans constantly remove heat from the Raspberry Pi’s components even under heavy workload.
Small 5V fans are readily available, and they integrate well with the Pi’s GPIO pins for power. When designing with fans, take care that their placement doesn’t interfere with other components or block access to ports.
A fan directly over the CPU, with a short, clear exhaust path on top of it, is usually the simplest and most effective arrangement. Suitable fan options include:
- USB-powered fans for simple integration
- GPIO-powered fans for direct control through the Pi
- Case-mounted fans with adjustable speeds for quieter operation
Thermal Testing Methods
Verifying through testing that your design is providing cooling in the most effective way possible. Deploy infrared thermal sensors, or similar devices, capable of reliably detecting hot and cold spots, especially specific hot areas like the CPU and power supply.
Free software tools such as vcgencmd or using hardware sensors will give you up to the moment temperature data. To achieve maximum capacity, perform stress tests like video encoding tasks or benchmarking applications to mirror heavy loads.
If operating conditions are hotter than 185°F (85°C), reconfigure the design. In fact, a simple fix like improving ventilation, moving things around, or turning up fan speeds usually solves the problem.
Testing over and over sharpens your argument until it consistently keeps safe temperatures, no matter what the conditions are.
Achieving Optimal Build Quality

Whether creating a simple accessory or a complex production fixture, achieving the perfect build quality requires consideration of materials, printing setup, and post-production finishing techniques. Every phase of the process plays an integral role in creating a product that will perform over time, functionally and aesthetically.
Developing an accurate model specifically for the Raspberry Pi Pico is key. Software such as Fusion 360 gives you the confidence to make precise design changes more quickly. Resources for open collaborative design platforms like GrabCAD offer a treasure trove of rich models to turn to for inspiration, with something available for all skill levels.
Material Selection for Durability
Selecting the right material helps make sure their case will maintain a solid performance all throughout its life cycle. Quality high-performing materials that are durable against wear, provide protection to the internal device, and withstand deformation under everyday usage is critical.
For Raspberry Pi cases, consider:
- Good printability and dimensional stability make this material a great option for prototyping or production.
- ABS (Acrylonitrile Butadiene Styrene): Stronger and more heat-resistant, perfect for hotter climates.
- PETG (Polyethylene Terephthalate Glycol): Merges rigidity and resilience, ideal for applications where high impact resistance is essential.
Each material compound contributes to the final build quality in its own unique way. For example, PLA provides excellent ease of prototyping, while ABS provides durability for long-term use. Consider how the material will work with the use and the environment, always.
Printing Orientation and Settings
Poor printer setup can lead to a build lacking precision and strength. A tolerance of 0.4 mm between components allows for correct placement without risking part stability. Adjusting your 3D printer’s layer height to around 0.2 mm balances detail and printing speed, while an infill percentage of 20-30% provides structural integrity without excessive material use.
Orientation is extremely important as well—printing the case with its base facing flat with the print bed reduces warping and failures. In addition to minimizing the use of supports, testing multiple orientations helps to create the best surface quality possible.
Consistently test the design for printability and other production problems and correct them before going to production.
Post-Processing Techniques
Additional post-processing improves both the case’s look and feel. Sanding the surface first is an easy way to smooth out any imperfections, and polishing gives it that professional touch.
Painting or applying protective coatings improves both aesthetics and durability, perfectly matching the Raspberry Pi Pico. Deconstruction with care keeps the display case in perfect-as-new condition, preventing scratches or scrapes from showing your hard work.
Addressing Noise and Vibration

In designing a Raspberry Pi case, noise and vibration can significantly impact the performance and usability of the desktop computer case. Addressing these issues involves understanding their sources, implementing thoughtful design features, and prioritizing quiet operation for comfort, ensuring a high-quality 3D print that protects fragile components.
Identifying Sources of Noise and Vibration
Noise and vibration in Raspberry Pi cases mainly stem from internal hardware components. These are things like cooling fans, hard drives, and other mechanical elements. Equipment like fans, for example, can produce infrasound waves, which, while inaudible, can still lead to discomfort with prolonged exposure.
Vibrations produced by spinning parts can increase noise by being transferred through the case structure. This occurs as the vibrations pass through the materials, particularly when the case’s components lack sound-absorbing properties. Therefore, monitoring these vibrations is essential to ensure a quiet environment for your desktop computer case.
Through years of research, it’s been estimated that with the proper tools, like a vibration monitoring system or accelerometers, including the ADXL345, you can solve 90% of vibration-related problems. This three-axis digital accelerometer provides accurate vibration measurements, allowing you to address trouble spots in your design case more efficiently.
Dampening Techniques
When it comes to noise mitigation, vibration is an important aspect that needs to be addressed. Material selection is key. Noise reduction sound-absorbing materials, such as foams, silicone, or cork, can dramatically reduce noise levels.
Rubber feet and adhesive pads are simple fixes. They’re so good at this that they dissipate vibrations entirely before allowing them to reach the surface beneath the case. A few effective dampening materials include:
- Neoprene foam: Excellent for sound insulation and vibration dampening.
- Sorbothane: A viscoelastic polymer that absorbs shock and vibration.
- Acoustic foam panels: Useful for reducing airborne noise within the case.
These resources can be used to infuse your case design with high-impact wins.
Fan Selection for Quiet Operation
Choosing the appropriate fan is critical to providing needed cooling performance without excessive noise. Choose fans designed for ultra-quiet performance with features such as aerodynamically-tuned blades or fluid dynamic bearings.
Look at other specs like dB rating and CFM (cubic feet per minute) side by side. This will assist you in achieving the ideal equilibrium between your ventilation requirements and sound mitigation. Quieter fans may be less efficient in their cooling output, but they provide a much better user experience.
This is what makes them ideal for desktop or office environments.
Avoiding Common Design Pitfalls

Designing a Raspberry Pi case requires attention to detail, as even minor oversights can impact functionality and usability. By avoiding these design pitfalls, you will be on your way to building a pragmatic, useful, and robust user-centric business case.
Read on as I examine common pitfalls, share how they can be avoided, and provide solutions to prevalent pitfalls.
Overly Complex Designs
One of the biggest pitfalls when designing a Raspberry Pi case is making the structure more complicated than necessary. Inserting an additional complex, fragile feature increases the chances that this feature will result inan assembly error or damage. This is a recipe for errors to be introduced during manufacturing.
For instance, a solution with lots of moving pieces might seem clever on the surface, but it might drive users to distraction in getting it set up. Simplicity of design is so important because if you have a complicated design, people won’t understand how to use it.
Put the focus on the fundamentals like access to wind ports, resiliency and robustness, and stability. A more pragmatic approach would be to design for snap-fit mechanisms rather than screws to allow a faster assembly while making the product less susceptible to failed designs.
Finding the right balance between complexity and practicality is important. Imagine a design that just provides the basic elements, such as cable entry and mounting holes.
Avoid façade flourishes such as added decorative cutouts that can compromise the integrity. Approaching your design from the start with a focus on efficiency will not only save you time, but it will also create the best case to be practical and user-friendly.
Insufficient Ventilation
A related, but equally vital consideration, is ventilation. Raspberry Pi boards will definitely overheat if heavily worked on, so you need to consider airflow in your design. Provide vents or a mount for a cooling fan in regions prone to heat accumulation, like next to the processor or power supply.
In their place, wide slots or a mesh design can help improve airflow while still maintaining the case’s overall durability. Heat management testing and iterations are absolutely necessary during the prototyping phase.
Test the Raspberry Pi with real-world workloads to find out if there’s a risk of overheating in use. Poor ventilation can lead to thermal throttling, a built-in safety feature that decreases performance, or, in severe cases, it can damage the hardware.
Considering this during the design stage makes your wearable more reliable and increases device longevity.
Difficult Assembly
Difficult or complicated assembly processes will discourage people from even trying your case. Seek to create scenarios that are easy to intuitively assemble. Assembly without tools, whether through snap-fit parts or covers that magnetically attach, helps consider the user’s sanity.
Clear visual assembly instructions with diagrams and or numerical step by step instructions help users assemble the case correctly without undue frustration. User feedback is a super important part of making sure you’re on the right track with your design.
If your users complain that they can’t get pieces to fit together, design alignment pegs or guides on the pieces for them. Iterating based on user feedback can make a good design great, creating a seamless experience that the user will see and appreciate immediately.
Enhancing Functionality and Aesthetics

When designing your own Raspberry Pi case, you’ll want to consider both functionality and aesthetics. A carefully considered aesthetic design not only shields sensitive components but enhances the experience of using the product.
Neatly run cable raceways and modular furniture can really take a nice setup to the next level. Custom-designed features increase functional flexibility and aesthetic value, making it an alluring pavilion.
Cable Management Solutions
Proper cable management is key in maintaining either a mobile or permanent Raspberry Pi workstation. Construct your home base with integrated routes or storage areas.
These external features will internally route cables away from ports and pins, preventing tangling and keeping them readily available. Including clips or holders within the enclosure can keep cables from moving around, avoiding excess tugging on interfaces.
For instance, they designed small 3D-printed hooks that connect to the inside of the tent and hold USB and power cables organized along the edges.
Here are a few strategies for better cable management:
- Use adhesive cable clips to keep cables routed along the side walls of the case.
- Add places for cables to run through so they can go out smoothly without cluttering port openings.
- Use Velcro straps or zip ties to bundle any extra cords.
Not only do these solutions get the organization right, but they also increase the case’s usability and longevity.
Modular Design for Expandability
A well-thought-out, modular design for your Raspberry Pi case ensures flexibility to meet future needs. By integrating replaceable panels or snap-fit components, you’re future-proofing upgrades such as advanced cooling systems or even new connectors. Utilizing 3D print technology can further enhance this design, allowing for custom modifications and adaptations.
A sample with a modular approach, featuring a removable lid, provides easy access to GPIO pins and the microSD card slot. This design minimizes the disassembly needed for upgrades, significantly streamlining the process. Additionally, having CAD files ready for your design case can simplify creating new components.
Modular designs empower creators to elevate their projects from hobbyist to professional without the hassle of swapping an entire case. You can easily upgrade your new case by adding a replacement panel for a fan module or additional USB ports.
This modularity is what will make your smart system smarter and more future-proof!
Customization and Personalization Tips
Customizing your Raspberry Pi case not only helps it look great but also enhances the usability and satisfaction of the user. Personalizing the lid with something like your name, a name for your project, or even a logo gives the lid more character.
Play around with color combos or textures like matte or glossier finishes to suit your aesthetic. Light pipes are a unique solution, directing the LED light through the enclosure for a more finished look.
Fillets and chamfers on edges can soften sharp corners and improve the visual flow, as seen in the layered acrylic designs of cases like the C4 Labs Zebra Case.
These minor touches add functionality while serving to improve aesthetics and attention to detail, ensuring your case stands out as one-of-a-kind.
Conclusion

Designing a custom Raspberry Pi case combines form and function. Not only do you get to build something customized to your own specific needs, but you’ll quickly reveal your device’s true potential! Whether you’re addressing the thermal impact or the acoustics of your design, each decision you iterate on counts. A carefully designed case does more than keep your Raspberry Pi safe. It enhances your Raspberry Pi’s sturdiness and functionality.
Just concentrate on gathering all the right tools and materials, a step-by-step procedure, and maintain the design functional but stylish. Eliminating vibration or improving cooling might seem like minor improvements on paper, but they can completely change how your rig performs. You can make it uniquely yours by adding your own personal touches.
Begin tinkering and turn your concepts into creations. Early attention to design and fabrication pays off big-time with the awesome stuff you’re able to produce, both long-lasting and impactful.




