Skip to content

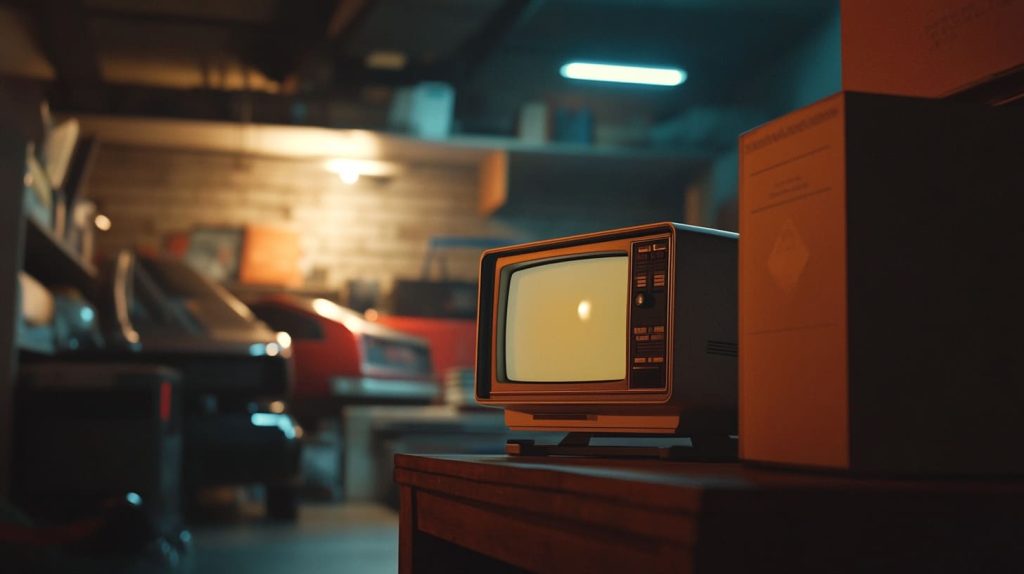
I still remember the day I stumbled upon an old, dusty CRT monitor in my parents’ basement. That curved glass tube took me back to long nights spent tinkering with retro consoles. Over the years, I’ve learned that the Raspberry Pi 3 can actually hook up to these classic displays. Today, I want to share my personal journey exploring that connection, as well as the practical details involved in making it all work.
Overview of Raspberry Pi 3 and Display Compatibility
I often chat with friends who assume the Raspberry Pi 3 is only good with HDMI. They’re surprised when I mention composite outputs can still make CRTs viable. From my experience, the Pi 3’s built-in ports allow some flexibility. But there are still important differences between digital signals and the analog world of a CRT. Let’s dig deeper into those contrasts.
Built-In Ports and Supported Signals
I discovered the Pi 3’s HDMI port is the primary go-to for modern monitors. But there’s also a 3.5mm jack that doubles as a composite video output. This hidden gem can be a bridge to older analog devices. On the other hand, I’ve also experimented with certain converters that adapt the Pi’s HDMI signal to analog. In my tests, each approach has pros and cons.
Differences Between Digital and Analog Outputs
Sometimes, I get nostalgic about the way analog CRTs display images, with that flicker and warm glow. However, digital displays are sharper and more power-efficient. That said, I find that using a CRT is all about the experience—perhaps you’re building a retro arcade cabinet or testing old-school video signals. But you need to understand refresh rates and resolution differences, which can get tricky.
I learned a lot from my first trial-and-error attempts at hooking up the Pi to a CRT. Let’s see how that translates into real-world use, and if it’s right for your next project.
Understanding Raspberry Pi 3’s Video Output

I’ve always been curious about how different outputs produce different qualities on screen. There was a time I spent several late-night sessions just messing around with the Pi’s config files. Each new setting felt like a mini experiment. Now, I'd love to guide you through those findings.
Built-In Ports and Supported Signals
I like to break down the Raspberry Pi 3’s video outputs into a simple table. It’s the easiest way for me to visualize what works best:
| Port | Signal Type | Primary Use |
|---|---|---|
| HDMI | Digital | Modern monitors/TVs |
| 3.5mm (AV) | Composite (Analog) | Older CRTs and basic video |
When I discovered composite signals were still supported, it opened up a door for me to revisit some classic displays. Yet, the experience isn’t always smooth. Let’s think critically: Do we truly need that nostalgic glow, or is a crisp digital monitor more functional? Context matters.
Differences Between Digital and Analog Outputs
I’ve noticed digital outputs (like HDMI) are straightforward. Just plug in and go. Analog, however, can demand more patience. You may see flicker or need to tweak geometry settings. So is that extra hassle worth it? For some of us, yes. For others, it might feel impractical. I always suggest considering your budget, time for troubleshooting, and desired visual style before you settle on CRT displays.
Sometimes I wonder if the unique “softness” of a CRT display could be beneficial for certain creative projects. In any case, keep your mind open to both sides of the argument. Next, let’s move toward the nuts and bolts of hooking up a CRT.
Using a CRT Monitor with Raspberry Pi 3

One time, a friend asked me if hooking up a Pi 3 to a CRT was “crazy.” I said, “Maybe, but it’s also a blast from the past.” Here’s why some people still love these old monitors, even in our modern age.
Pros and Cons of CRT Monitors
From my experience, the biggest pro is that timeless, retro vibe. If I’m building an arcade cabinet or playing old-school games, a CRT monitor feels authentic. However, I admit CRTs are bulky and less energy-efficient. That means you might have to find space (and strength) to lift them. Also, keep in mind the image clarity might not match the precision of today’s LCDs. Critical thinking time: if authenticity or certain visual effects matter to you, a CRT is fantastic. Otherwise, an LCD or LED display might be simpler.
Typical Use Cases for a CRT Setup
I’ve used a CRT for retro gaming, museum installations, and even for an art project that required analog distortions. Yet, it may not suit everyday office tasks. If you’re a Raspberry Pi enthusiast building a nostalgia-themed project, you might love it. But a business or a teacher might prefer modern monitors for clarity.
Basic Connection Methods to CRT
At first, I tried a basic RCA cable from the Pi’s 3.5mm jack to a CRT’s composite input. It worked but needed adjustments in the Pi’s config. On another occasion, I used an HDMI-to-VGA adapter, then a VGA-to-CRT adapter, which seemed like I was bridging two worlds. It’s not always neat, but it’s possible. Let’s examine these methods in more detail.
I recall a moment where I struggled to get color settings just right. I had to tweak the Pi’s overscan settings. That moment taught me that you need a bit of patience to succeed. Let’s keep that in mind and transition to the more technical side of connecting your Pi 3 to a CRT.
Common Connection Methods for Raspberry Pi 3 to CRT

I once spent an entire weekend testing different cables and adapters. My roommate thought I’d lost my mind. But I loved that sense of exploration. Let’s break these methods down.
Composite Output (RCA)
If your CRT has an RCA input, you can use a 3.5mm to RCA cable. In my case, I found cheap cables online. But buyer beware: you need the correct configuration because the tip-ring-sleeve design can vary. For instance, I once bought a cable that had audio where the video signal should have been. It caused utter confusion.
I always suggest verifying the pin layout before purchasing. Also, question whether it’s worth dealing with potential signal noise or lower resolution. In some retro gaming scenarios, a bit of fuzziness feels nostalgic. In professional settings, it might not be acceptable.
HDMI to Analog Converters
HDMI-to-analog converters can produce better results. I tested a converter to take the Pi’s HDMI signal and adapt it to composite. The picture looked clearer compared to direct composite. However, it did introduce a hint of input lag. Thinking practically: do you need sharper visuals, or is direct composite enough?
VGA to SCART Conversions
I consider this a more niche method. Some folks have older European TVs with SCART inputs. To me, SCART feels like stepping back into a past life, but it still delivers a solid signal. However, bridging VGA from an adapter to SCART can be a headache. I tried it once and ended up with no signal for hours until I discovered the cable’s pinout was wrong. Keep in mind these multi-step conversions may degrade signal quality if you’re not careful.
I vividly recall shouting in triumph when the screen finally lit up. That taught me to check every pin and read the specs thoroughly.
Potential Challenges
When I first got a stable signal on my CRT, I felt like I’d conquered a small mountain. But that was only the beginning. There are a few challenges you might face, and they’re worth thinking about critically before you dive in.
Signal Conversions and Quality Issues
One major headache is the mismatch between digital signals and analog hardware. Converters vary in quality. Sometimes, cheap ones produce a washed-out image or audio buzz. I advise reading user reviews or testing multiple brands if possible. The frustration of poor quality can really take the fun out of your project. Sometimes, the simplest route is to rely on the Pi’s native composite output if your CRT supports it.
Resolution and Refresh Rate Considerations
CRTs often run at specific resolutions or refresh rates. I’ve had experiences where the Pi boots fine, but once it hits the desktop interface, the monitor freaks out. You might need to tweak the config.txt to set a resolution your CRT supports. This is a prime example of how old tech and new tech can clash. Keep a logical mind and test incrementally.
Power and Heat Management
I once nearly burned my fingers on a converter that overheated after a few hours. Ensure you have a stable power supply for both the Pi and the adapter. Overheating can lead to glitchy performance or random shutdowns. Also remember that the CRT itself draws a significant amount of power. So, if you’re placing multiple devices on one power strip, be mindful of capacity.
Configuration and Setup Tips

Setting up the Pi with a CRT can feel like a puzzle, but once you solve it, it’s pretty satisfying. Think of it like assembling a model plane: you just need the right instructions and a bit of patience.
Editing the config.txt File for Analog Output
The config.txt is where you tell the Pi how to behave. For composite output, you might uncomment or add lines such as sdtv_mode or sdtv_aspect. I learned that setting the correct aspect ratio can be the difference between a beautiful display and a squished mess. Be prepared to reboot often during this phase.
Adjusting Resolution and Overscan Settings
Overscan defines how much of the screen the Pi uses. With a CRT, you might see black borders or part of the image missing. In my experience, fine-tuning overscan values is a trial-and-error process. But once you hit the sweet spot, it’s like magic. Think about whether you prefer a slightly smaller display that shows everything, or an edge-to-edge image that might cut off corners.
Testing and Troubleshooting Display Issues
I always keep a short checklist:
- Check cables and converters
- Verify config.txt settings
- Confirm power stability
- Test with a different display if possible
This practical approach saved me countless hours. Also, do a little brainstorming: If it’s a color issue, perhaps you mixed up cables. If it’s a rolling screen, the refresh rate might be off.
Best Practices

I’ve learned these best practices through multiple “almost gave up” moments. I hope they save you some time.
Choosing the Right Adapter or Cable
Your choice of adapter is critical. Cheap ones might lead to frustration. More expensive ones, in my experience, often have better shielding and signal conversion. Weigh your budget versus your desired quality. Also, don’t forget to confirm that your chosen adapter supports the correct resolution and refresh rate. Reflect on your priorities: Do you want the absolute best image, or is good enough truly good enough?
Ensuring Stable Power Supply
I once lost hours of progress because my Pi kept restarting. The culprit was an underpowered power supply. When hooking up extra converters, you need to ensure they have enough juice too. A stable supply can make the difference between a successful setup and a flickering screen of doom.
Optimizing Visual Quality on a CRT
If you want the best visuals on a CRT, you might have to tweak saturation, contrast, or brightness. Many older CRTs let you do this via hidden service menus or analog knobs. Carefully adjusting these can yield surprisingly good results. However, ask yourself if the end goal merits the time spent. Sometimes, a bit of softness is part of the CRT charm.
Comparison with Modern Displays
One summer, I ran a side-by-side test: Raspberry Pi 3 output to a CRT on one side and an LCD on the other. Watching that contrast was enlightening. Let’s see what we can learn.
Key Differences in Performance and Clarity
The LCD was crisp and bright, while the CRT had deeper blacks and smoother motion in fast games. Yet, text on the CRT looked fuzzy. If your project involves reading a lot of code or text, the CRT might give you a headache. But for gaming, it can feel alive and authentic. Think about your goals, then pick your side.
Cost and Availability Factors
In many places, you can grab a used CRT for free or at a minimal price because people are just tossing them out. But shipping can be expensive due to the weight. Also, new CRTs are basically extinct. Meanwhile, modern monitors are cheaper, more energy-efficient, and widely available. A critical reflection: If something goes wrong with a CRT, finding parts might be a challenge.
When to Consider CRT Over LCD
I personally consider a CRT for retro gaming, nostalgia-based projects, or if I’m setting up a themed arcade. For everything else, an LCD is simpler. That said, sometimes a limitation can spark creativity. You never know what interesting ideas might arise from working with older tech. So, keep an open mind.
Conclusion

I hope this journey through Raspberry Pi 3 and CRT monitors has been helpful. It’s been a winding road, full of both challenges and rewards. Let’s wrap up by summarizing key points and offering a final nudge on where to go from here.
Summary of Key Points
- Composite output and HDMI converters are your main methods to connect a Pi 3 to a CRT
- Configuration in config.txt is crucial for resolution, overscan, and other adjustments
- CRT monitors offer nostalgia but can be bulky, energy-hungry, and require extra care
- Modern LCDs may provide clearer text and easier setup but lack that retro glow
Final Recommendations and Next Steps
If you decide to try a CRT, plan for some troubleshooting. Also, weigh your motivation: Are you after nostalgia or practical daily use? By focusing on the right method, double-checking power supply, and fine-tuning config files, you’ll improve your odds of success. Now, it’s your turn to build something memorable. Good luck, and have fun exploring the world of Raspberry Pi and vintage displays.